The Ultimate Guide to Using a Heatless Hair Curler for Perfect Natural Waves

Dreaming of soft, natural-looking waves but worried about the frizz and breakage from hot tools? You’re not alone. The heatless hair curler has become the go-to solution for achieving stunning texture without exposing your hair to damaging heat. By using simple physics and time, these innovative tools deliver beautiful, heatless curls that look effortlessly chic. A standout option is this wrap-style heatless curling ribbon, a fabric-and-foam strip designed to create salon-worthy waves while you sleep. Let’s dive into why this method works and exactly how to master it for gorgeous, healthy hair.
Why Choose a Heatless Hair Curler? The Unbeatable Benefits
Switching from hot irons to a heatless curling method is more than a trend—it’s a commitment to healthier hair.
- Zero Heat Damage: The biggest advantage is eliminating thermal stress. Without high temperatures, you avoid cuticle damage, split ends, and dryness, making it safe for color-treated, bleached, or fragile hair.
- Softer, More Natural Results: Unlike the sometimes-uniform and artificial look from curling wands, heatless waves are inherently softer, looser, and more “lived-in,” mimicking the texture of naturally wavy hair.
- Incredible Ease of Use: No technical skill is required. The process is simple, and you can create your style overnight, waking up with perfect waves ready to go—a major time-saver for busy mornings.
- Works for All Hair Types: Whether you have fine, straight hair or thick, wavy locks, a heatless curler can be adapted to work for you. The outcome is controlled by your technique, not the tool’s limitations.
Your Step-by-Step Tutorial for Perfect Heatless Curls
The wrap and set method with a curling ribbon is straightforward and highly effective. Follow these steps for consistent, beautiful waves every time.
Step 1: Essential Preparation for Best Results
The right starting point is crucial for long-lasting curls.
- Achieve the Perfect Dampness: Start with clean, towel-dried hair that is damp to the touch, not soaking wet. This moisture is key for the style to set. If your hair is already dry, mist it lightly with water from a spray bottle.
- Apply a Styling Product: Work a small amount of curl-enhancing mousse, a light leave-in conditioner, or a texturizing spray through your lengths. This reduces frizz, adds definition, and helps the waves hold their shape longer, especially important for fine hair.
Step 2: The Core Wrapping Technique
This is where you create the foundation for your waves. Consistency is key.
- Position the Ribbon: Find the center of the long ribbon and place it at your forehead or hairline. Let the two equal-length ends hang down the front of your shoulders.
- Section and Wrap: Starting on one side, take a 1 to 1.5-inch section of hair from the front. Begin wrapping it down the length of the ribbon, keeping a gentle but consistent tension. The ribbon acts as the curling rod. Continue wrapping all the way to the ends of that section.
- Secure and Repeat: Use the attached tie or a small clip to secure the wrapped hair to the end of the ribbon. Repeat the entire process on the opposite side, wrapping your hair around the other end of the ribbon. Ensure both sides are wrapped with similar tension for symmetrical waves.
Step 3: Setting and Revealing Your Waves
Patience transforms the wrap into beautiful waves.
- Let It Set: Allow the wrap to set for a minimum of 4-6 hours. For the most defined and long-lasting overnight curls, leave it in while you sleep (6-8 hours is ideal).
- The Grand Reveal: In the morning, gently untie and unwrap your hair. Do not use a brush. Instead, flip your head over and use your fingers to scrunch at the roots for volume. Let the curls fall naturally, using your fingers to gently separate any sections for a softer, more voluminous look.
Pro Tips for Customizing Your Heatless Curls
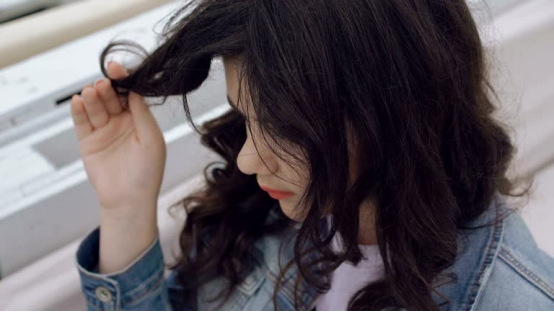
Master the basics, then use these adjustments to create your signature style.
- For Larger, Beachy Waves: Use bigger sections of hair (2 inches or more) and wrap with less tension. A shorter setting time (4-5 hours) will also yield a looser wave pattern.
- For Tighter, More Defined Curls: Use smaller, pencil-thin sections of hair and wrap them snugly against the ribbon. Extend the setting time to a full 8 hours or overnight.
- For Maximum Volume and Root Lift: Before you start wrapping, gently tease or backcomb the hair at your crown. When you unwrap, flip your hair and shake it out vigorously at the roots.
- For Different Hair Types:
- Fine or Thin Hair: Use a strong-hold texturizing spray before wrapping to add grit and memory. Consider slightly dampter hair for better set.
- Thick or Coarse Hair: Ensure hair is adequately damp and use a stronger-hold styling cream. You will likely need the full 8+ hours to set the waves completely.
- Naturally Curly Hair: Use the heatless hair curler to enhance and stretch your natural pattern, reducing frizz for defined, uniform curls with less shrinkage.
Caring for Your Hair and Your Heatless Curler
- Prioritize Hair Health: Always be gentle when wrapping and unwrapping to prevent mechanical breakage, which is easier on damp hair.
- Keep Your Tool Clean: The ribbon can absorb oils and product over time. Hand-wash it occasionally with mild soap and let it air dry flat to maintain its texture and effectiveness.
- Proper Storage: Loosely coil the ribbon or hang it up after use. Avoid sharp, tight folds that could permanently crease the foam core.
Conclusion: Embrace Beautiful, Healthier Hair
A heatless hair curler is more than just a styling shortcut; it’s a smarter approach to haircare. It proves that you can achieve beautiful, stylish results without compromising the integrity of your hair. The simplicity, effectiveness, and gentle nature of the wrap method make it an essential tool for anyone’s beauty routine.
Ready to give your hair the break it deserves and unlock the secret to perfect, heat-free waves? Try this easy-to-use heatless curling ribbon and start your journey to healthier, gorgeous hair today.