Master Your Heatless Curler: A Guide to Lasting, Damage-Free Waves

Want beautiful, bouncy curls without the frizz and breakage caused by hot tools? The right heatless hair curler offers a perfect solution, creating gorgeous waves while protecting your hair’s health. Popular styles like the Large Wave rod, the Octopus wrap, and the Wrapping Strip promise salon results without heat damage. Yet, many find their curls fall flat quickly. The secret isn’t a better product—it’s better technique. This guide breaks down the exact steps, from prep to finish, to ensure your chosen heatless hair curler delivers curls that last all day.
Foundation: 3 Pre-Styling Steps for Maximum Hold
A heatless hair curler relies on your hair’s ability to hold shape as it dries. Proper prep creates the ideal canvas for long-lasting curls.
1. Nail the Dampness
Your hair should be damp, not wet, when you start. After washing, gently squeeze with a towel. Hair should be 60-70% dry—no dripping, but slightly damp from mid-lengths down. This moisture is key for any heatless hair curler: too dry and hair won’t hold the shape; too wet and curls will be limp.
2. Apply Light Product
A small amount of product enhances your heatless hair curler’s results. Use a pea-sized dab of mousse, cream, or lightweight leave-in conditioner. Scrunch it into mid-lengths and ends. This adds grip and helps hair “remember” the curl pattern from the heatless hair curler.
3. Section Neatly
Divide hair into 2-5 sections based on thickness. Detangle each section before wrapping it around your heatless hair curler. This ensures every strand wraps smoothly for uniform, lasting curls.
Technique Guide for Each Style of Heatless Curler
Each heatless hair curler type requires a specific approach for best results.
1. For Loose Waves: The Rod-Style Heatless Curler
Ideal for medium to long hair wanting soft, beachy waves.
How to Use This Heatless Curler:
- Center the rod at your crown.
- Take a 1-2 inch section. Starting at the ends, wrap hair snugly around the rod in one direction.
- Keep wraps tight and close together.
- Secure the end with the attached scrunchie and clip the rod in place.
- Repeat on the other side.
Pro Tip: Slightly tighten the wrap near roots for lift, then ease tension at the ends. For a model designed for this technique, see the Large Wave heatless curling rod.
2. For Voluminous Curls: The Octopus Heatless Curler
Perfect for all lengths wanting defined, bouncy curls.
How to Use This Heatless Curler:
- Secure the headband around your head.
- Divide hair into 6-8 sections.
- Take one section, loop it through a Velcro strap, and wrap it tautly up to the roots.
- Press the strap back onto the headband to secure.
- Repeat for all sections.
Pro Tip: Maintain even tension on each section. The Velcro provides strong hold for this type of heatless hair curler.
3. For Tight Curls: The Wrapping Strip Heatless Curler
Best for creating spirals, coils, or lots of volume.
How to Use This Heatless Curler:
- Pin one end of the strip near your crown.
- Take a small section of hair (½ inch wide).
- Twist the hair and strip together tightly from roots to ends.
- Tie the strip in a loose knot to secure.
- Repeat around your head.
Pro Tip: For extra hold with this heatless hair curler, twist the hair slightly before wrapping it with the strip.
The Finish: Setting & Removing Your Style
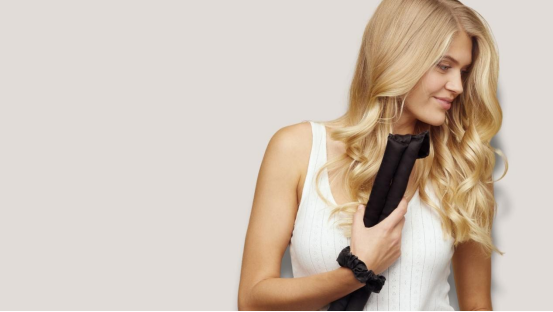
How you remove the heatless hair curler is crucial for longevity.
Let It Set: Allow 4-6 hours for daytime styling, or 8 hours overnight. If short on time, use a blow dryer’s cool setting for 5-10 minutes to help set the shape.
Remove Gently: Don’t pull! Carefully reverse the wrapping process based on which heatless hair curler you used.
Lock It In: Once free, don’t brush. Shake roots with fingers, flip over, and scrunch curls. Mist lightly with hairspray from 10-12 inches away. Cup curls in your hands to set.
Customizing for Your Hair Type
- Fine/Thin Hair: Use lightweight products. Wrap sections snugly in your heatless hair curler. Focus volumizing spray at roots.
- Thick/Coarse Hair: You may need damper hair and longer setting times (8+ hours). A light gel or mousse before using your heatless hair curler helps with hold.
- Curly/Frizzy Hair: Start with a smoothing serum. Wrap hair as smoothly as possible with the heatless hair curler. Use a tiny amount of oil on palms when scrunching finished curls.
Common Mistakes to Avoid
- Hair too wet/dry: Aim for that 60-70% damp sweet spot for any heatless hair curler.
- Wrapping too loose: Maintain gentle, consistent tension for the curl to form a strong memory.
- Brushing curls out immediately: Always use fingers first to preserve the curl pattern created by your heatless hair curler.
Conclusion: Technique is Key to Perfect Heatless Curls
A heatless hair curler is a powerful tool for healthy, beautiful hair. By mastering preparation, choosing the right wrapping technique, and finishing properly, you can achieve stunning, long-lasting results without damage.
The promise of all-day curls is within reach with the right approach to your heatless hair curler. It’s about working with your hair’s natural properties.
Ready to find your perfect match? Compare styles and techniques in our guide to effective heatless curlers for every hair type.